
Data migration is a critical yet often overlooked step in implementing an ERP system like NetSuite. It is not just about transferring files from legacy systems such as QuickBooks, but involves understanding data structures and executing a well-planned process.
As NetSuite systems rely on centralized databases accessed across departments, migration errors can disrupt reporting, supply chains, and decision-making. For example, a retail company assigned migration to an inexperienced employee, resulting in incorrect financial data and delays.
To avoid such risks, it is essential to select the right data, evaluate source systems, and assign the task to skilled professionals. If it is done right, NetSuite data migration ensures ERP success and business efficiency.
What is NetSuite Data Migration?
NetSuite data migration is the process of transferring essential business data from existing sources into the NetSuite enterprise resource planning system. This involves moving data from various systems, formats, and storage types into a single, consistent structure that supports smooth business operations.
Before adopting an ERP system, departments within a company often use different tools. Finance teams may rely on accounting software, human resources may use separate applications, and other teams may depend on spreadsheets. To ensure a successful transition, organizations need a structured approach. This usually includes reviewing the data, extracting it from each source, cleaning it to remove errors, and converting it into a format that fits the NetSuite system before importing it into the database.
Why Data Migration Is Important For ERP Implementation?
Beyond simply transferring information, data migration offers a valuable opportunity to evaluate the quality and relevance of existing data before it enters the new NetSuite environment. Organizations often carry over years of accumulated records, some of which may be outdated, duplicated, or no longer useful. A thoughtful migration strategy allows businesses to cleanse and optimize their data, ensuring that only the most accurate and actionable information powers the new system.
Additionally, well-managed data migration services contribute significantly to the overall success of the NetSuite project by reducing post-implementation issues. Clean, well-structured data enhances user adoption, improves reporting accuracy, and accelerates the return on investment. It also ensures better alignment between departments by enabling consistent insights and fostering data-driven decision-making from day one.
Challenges that Come Up with Data Migration

There are several difficulties that might arise during NetSuite data migration. Let’s take a closer look at them:
- Data Redundancy and Integrity
Although different departments may maintain duplicate copies of the same customer or product information, the data is often inconsistent. Each department may categorize or store information differently. For example, using varied formats for client names or addresses, or multiple domains for the same customer. Uploading all entries without validation can lead to duplicate or incorrect customer records. To address this, it is important to standardize data formats and perform data deduplication before importing.
- Cost of Data Migration
The process of extracting, cleaning, and restructuring data can take up a significant portion of the NetSuite implementation budget. According to a survey by ERP Focus, data migration can increase the total project cost by 10 to 15 percent, even when moving between NetSuite systems. To manage costs effectively, it is recommended to create a detailed migration plan early in the project, prioritize the most valuable data, and automate data cleaning wherever possible.
- Stakeholder Support
NetSuite data migration may not be a top priority for senior management, as they are often focused on other business responsibilities. However, strong leadership support is essential to prevent internal conflicts. Different departments may use various systems and have their own ways of entering and managing data. It is important to involve leadership from the beginning by clearly communicating the value of clean, unified data.
- Legal Concerns
An increasing number of regional and industry-specific regulations affect how businesses handle and retain data. For example, healthcare providers must follow HIPAA rules that require six years of record retention. Similarly, laws like the General Data Protection Regulation (GDPR) and the California Consumer Privacy Act require businesses to delete customer data upon request. To comply with these legal requirements, organizations should involve legal and compliance teams early in the planning process.
Also Read: Best Practices for ERP Data Migration
Steps To Build An Effective ERP Data Migration Strategy
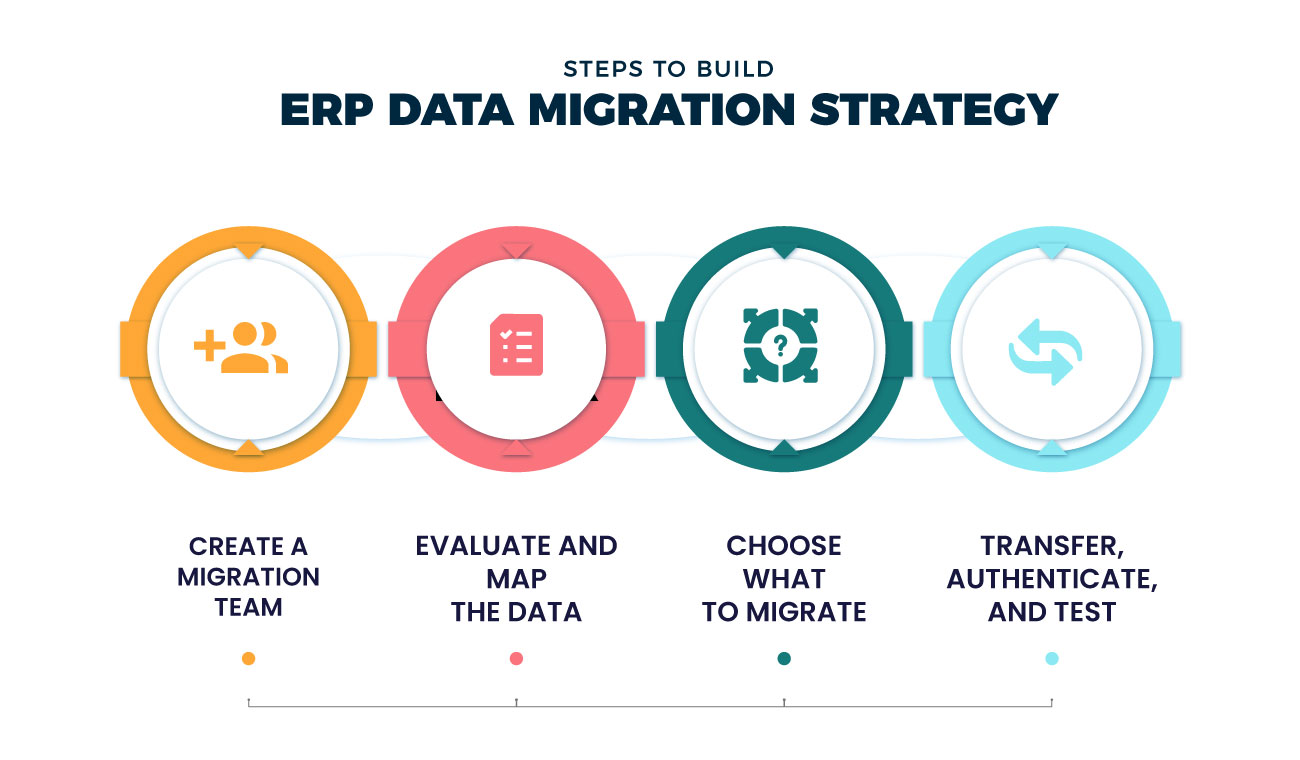
It’s crucial to develop a data migration process that takes into account a number of crucial components in order to guide the business through the occasionally challenging process of transferring data to the ERP system.
Establish a Migration Team
Organize a team of individuals who will be in charge of determining which data has to be transmitted, as well as how to clean the mess. Representatives from other business areas who can provide insights into how data is utilized by respective groups will normally be included in the data migration group, which is typically a part of your overall ERP installation team.
Evaluate and Map the data
Look for duplicates and discrepancies in the data in each of the source systems. Prior to integrating data into the ERP system, the data transformation team will need to determine how to address such problems. You’ll also have to map the info to the ERP database’s structure during this phase of deployment so that technical solutions can integrate the data.
Choose What To Migrate
Traditional systems may hold information that is no longer relevant, such as data on out-of-date items, suppliers, or customers who haven’t placed an order in a long time. Systems could also have records of previous transactions. Based on your data retention regulations, you may not have to use much of the information in the new system, so you may keep it offline or in a different system.
Transfer, Authenticate, and Test
Your new ERP system could come with ERP data migration tools that make the process of automating data import from other systems easier, but you might first need to rationalize the data and, in certain situations, transform it into a format that the ERP system can understand. Test all business groups and ERP applications using the transferred data before going live.
Overview of the NetSuite Data Model
Like many systems that collect and manage data, NetSuite includes a schema that outlines the structure and types of data it holds. This schema can contain everything from customer details to internal management information and is commonly referred to as a data model diagram.
Simply put, NetSuite is designed to link data tables in a way that resembles how Excel connects spreadsheets to compile information. Understanding the structure of the records you intend to import into NetSuite, whether from a single source or multiple sources, is essential, as is matching the fields between systems accurately.
Let us focus on the structure of a data file that will be uploaded into NetSuite. When this file is not properly formatted, it can lead to delays and complications. That is why this step is so important, not only to speed up the implementation process but also as a key responsibility for any organization aiming to succeed in the data migration process.
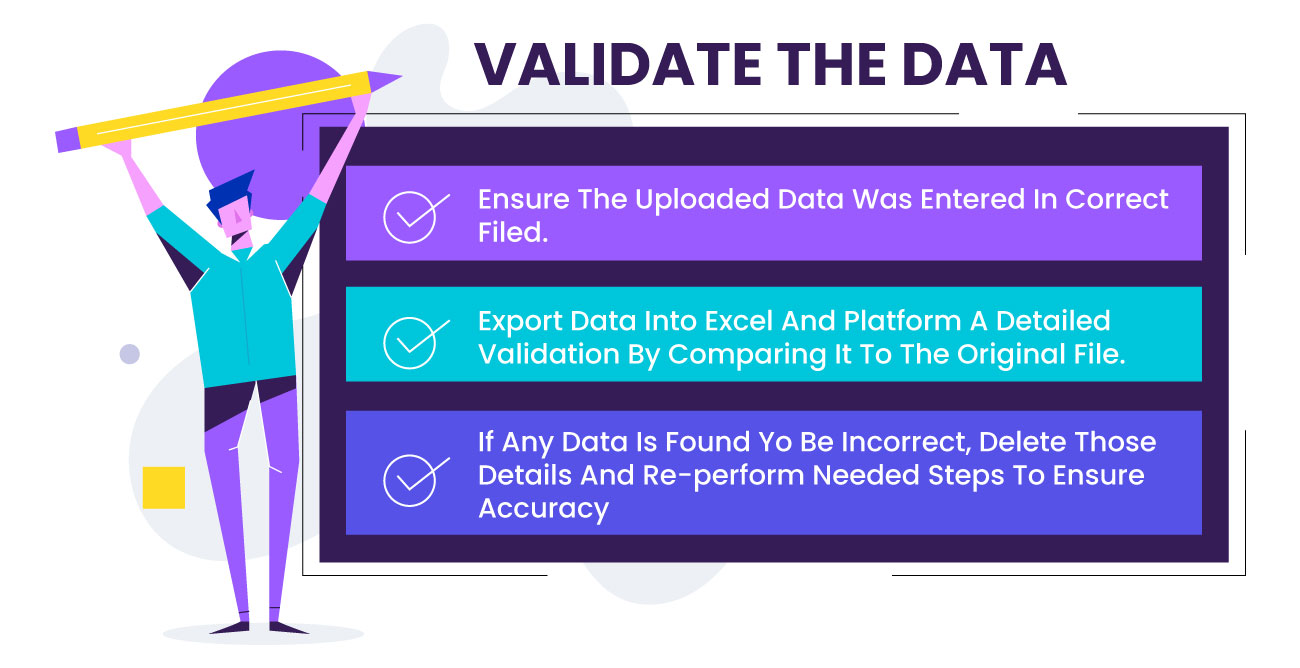
You will receive a notice confirming that you completed the process successfully. The Job Status Page also allows you to constantly check the import status. Furthermore, your records will eventually be accessible in NetSuite. The length of time required for this final step depends on how many records are being imported. Additionally, the status bar will show the results of all your import efforts. Likewise, the system offers a CSV error log if something goes wrong.
The Fundamental Steps to Generate, Save, and Transfer Data Files
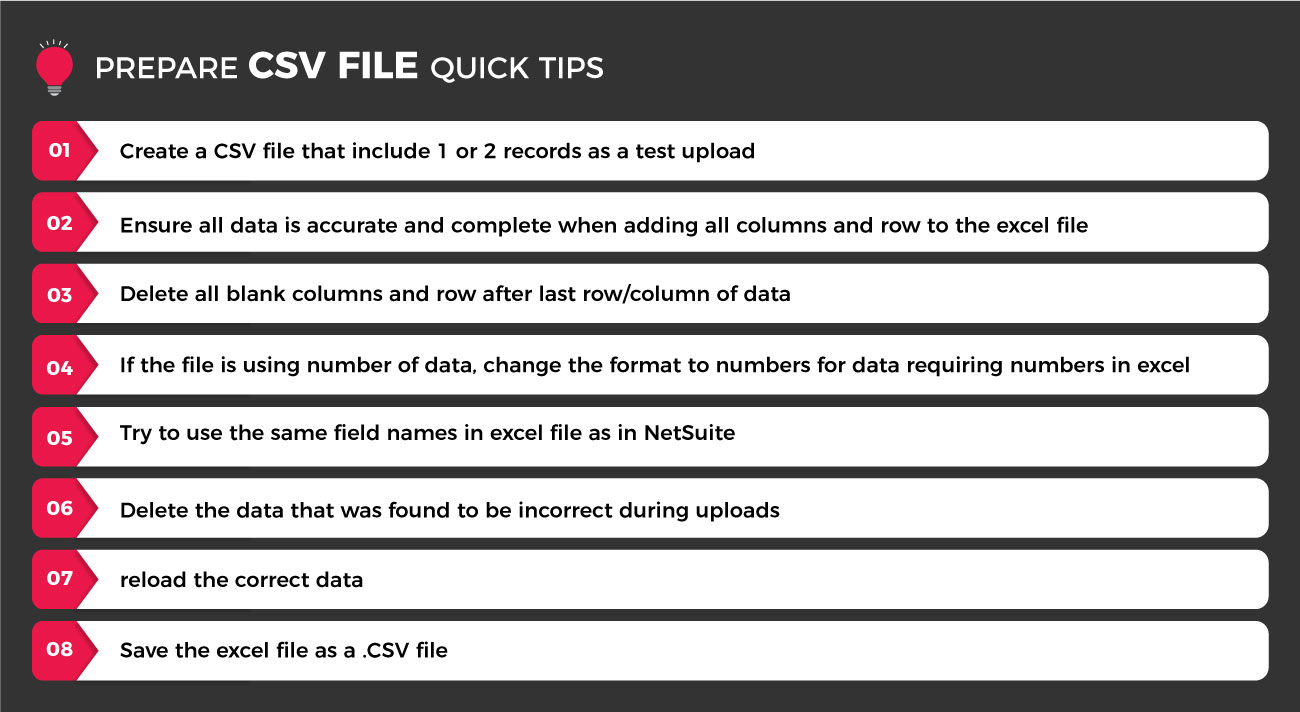
Step 1: Create CSV Files
NetSuite can only handle the CSV data file format. For the numerous records accessible in NetSuite, the data transfer procedure is made simple by using the CSV Import Assistant. How the data is recognized depends on the cell’s format. This is true for things like numbers, money, dates, and time. Make sure that every cell is in General layout prior to beginning with the creation of a CSV file for NetSuite to prevent complications.
For some of the most important records in NetSuite, NetSuite implementation providers work hard to provide simple-to-use NetSuite CSV Import Templates (vendors, employees, and clients). For our clients, simple, efficient operations are what we strive for.
Next, insert your data into the columns. Data must be comprehensible and consistent. It’s a typical misconception to believe that there won’t be difficulties, including data sources that don’t export values with the necessary precision. Here are some fundamental actions from our post on data migration best practices to help you save time and resources:
- Create a view of your data: This is an excellent way to monitor your statistics at any moment. You might be able to display your data in a list format on some systems.
- Verify accuracy based on field frequency: It’s possible to have crucial fields that you never utilize. Unused fields are unnecessary and should not be included.
- Perform spot checks on the format: Decide with your team how the business will submit the data as new records are produced. Check details like your address fields and if your phone number constantly starts with “+1” or occasionally gets jumped.
- Find duplicates: It’s important to keep your data consistent. In order to verify the accuracy of the data and perform a clean migration, you may discover duplicates using Excel’s filters and formula choices as you prepare your files.
- Verify the format of the new system: Constantly inquire about how the particular target system will be configured with your consultants and PMOs. The required fields, format, and framework of the implementation solution frequently differ from those of your outdated system.
Step 2: Save your CSV Files
Share your finished files with the ERP consulting team to verify the workflow. Keep in mind that effective communication between all parties is essential to success.
The procedure functions in NetSuite starts with uploading employee record. To create this file, select “General” as the format for all the columns. Take note that the format for emails and phone numbers is uniform. As previously indicated, maintaining order has a significant positive impact on reporting and cross-sectional data. Once your file is prepared, you must go to the Excel “Save As” choices and choose the CSV option in order to produce CSV files. Finally, export to Excel.
Step 3: Importing CSV Files
Once our upload file is well-prepared, NetSuite’s procedure is straightforward. Nothing makes you happier than a data import that succeeds on the first try. All data imports must be done by going to Setup > Import/Export > Import CSV Records, with the exception of inventory modifications.
4 Stages To The NetSuite Import Assistant

- Scanning and Uploading the CSV File
Based on its kind, the NetSuite Import Assistant categorizes data. The first step is to choose the import type. There are several choices that may be used to determine the type of record you’re trying to import. The record you’re trying to import, like employees, must then be specified. Regardless of their type, custom records can likewise be controlled by the import assistant.
- Sorting the Import Option
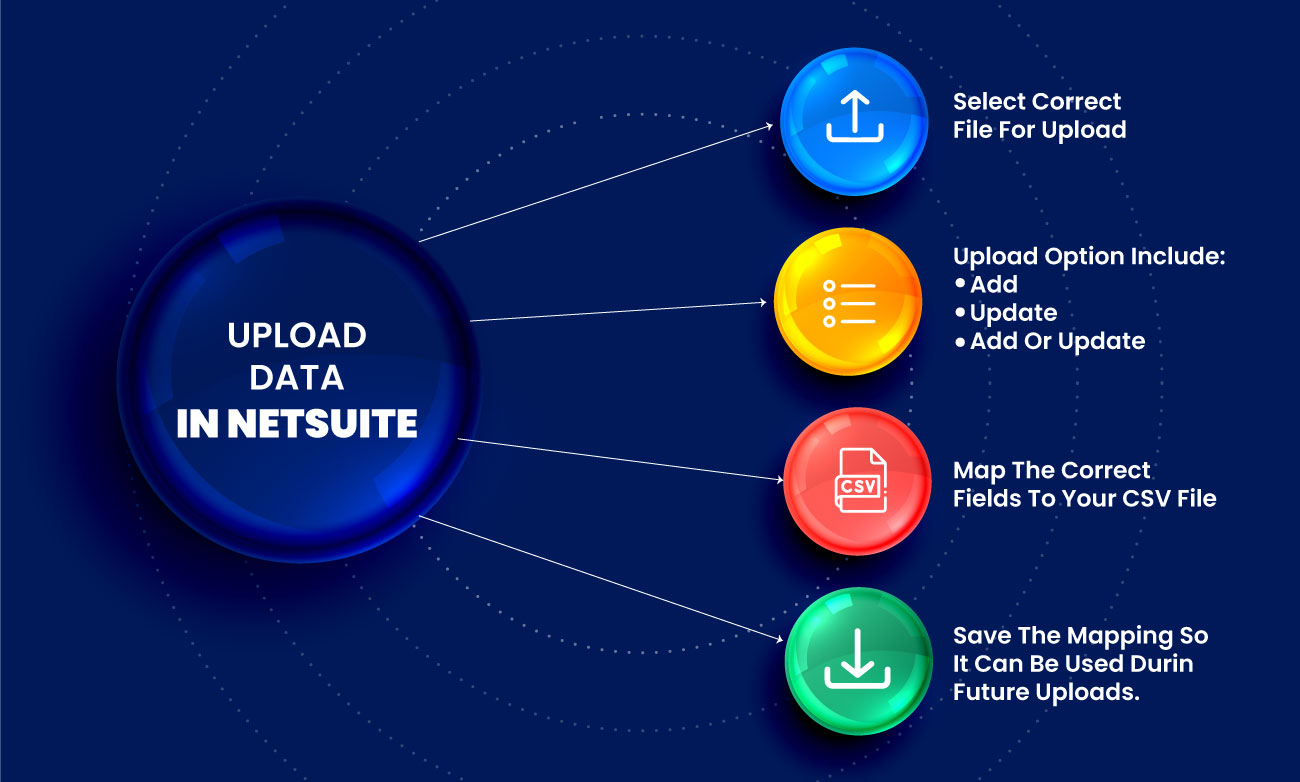
The system will have three alternatives- Add, Update, and Add or Update. Once you click “next,” it specifies how the data will be entered into the system. There is no going back once you choose one of these alternatives. There is no remorse feature in the Import Assistant to undo your work. Once written, the data cannot be erased or removed using the import features since it is permanently recorded. The only option is to manually delete it. When transferring them into NetSuite, be cautious with your choices of files.
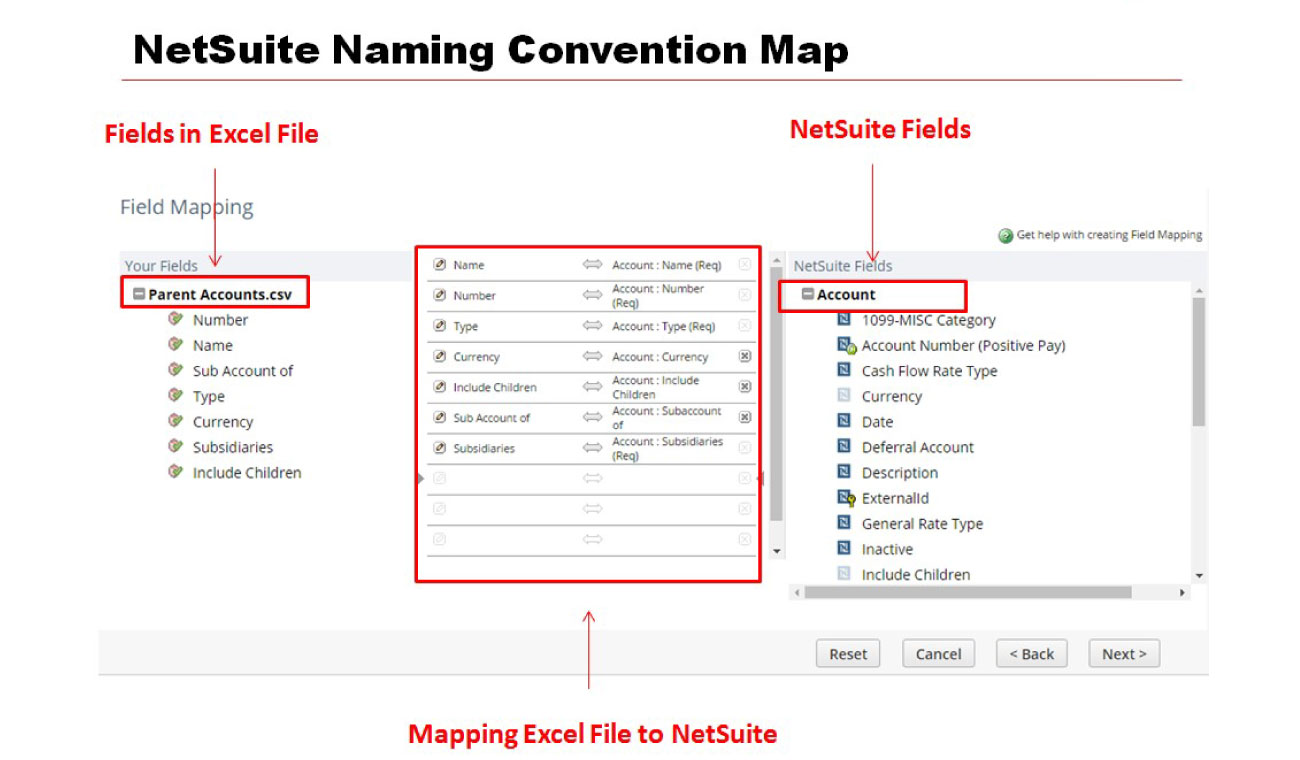
- Field Mapping
NetSuite Data mapping comes after selecting “next” in this section. The only thing left to do is link the information in the file to the fields that correspond to the record. Any field from NetSuite that is accessible is prepared to match with your CSV file in the NetSuite data model diagram. In some special situations, you may establish static settings as well. For instance, if all of your employees are from the United States, you can set the “Country” column to “USA” for every entry.
- Save Mapping and Start Importing
The final step is to give your import a name. This feature is helpful for saving time if you frequently import data into your system using CSV records by using a template with a robust setup already completed. In order to begin the data import, click “Save & Run.” Save mapping and begin importing with the import assistant.
You’ll get a notice confirming that you completed this successfully. The Job Status Page constantly allows you to check the import status. Your records will eventually be accessible in NetSuite. The length of time required for this last step depends on how many records are being imported. The status bar will show the results of all your import efforts. The system offers a CSV error log in the event that something goes wrong.
How Does NetSuite Impact Data Migration?
NetSuite systems significantly shape the way data is collected, managed, and structured, which directly affects how successfully that data can be migrated. Reliable data gathering becomes especially important when preparing to move information into a new NetSuite platform. Today, managers rely on complex data architecture to forecast societal trends, analyze consumer behavior, and evaluate employee performance. These systems provide the foundation for many business decisions.
It is critical to understand the value of each piece of data being collected during NetSuite implementation. Your data must remain clean and consistent over time, and this is key to ensuring long-term efficiency. However, poor-quality data is a common issue that reduces system performance and introduces inefficiencies, such as time spent correcting errors or managing routine issues. As a result, identifying the most frequent sources of mistakes allows businesses to uncover root causes and build a strategy for ongoing data management.
Top 5 Data Maintenance Tips
Maintaining clean data during and after NetSuite implementation is critical. The following are five key tips to help improve ongoing data quality:
- Use Unique IDs
Assigning a unique ID to each entry is one of the easiest ways to keep data organized and trackable across the system.
- Standardize Inputs
Set clear formatting rules for names, addresses, and phone numbers. Ensure all required fields are consistently filled out during data entry.
- Remove Duplicates
Duplicates are a common issue in databases and can confuse. Regularly scan the system to identify and eliminate them.
- Fix at the Source
Always update or correct records at their original entry point. This helps reduce repeated errors and keeps the system accurate.
- Clean Regularly
Plan scheduled cleanups to improve performance and reduce costs. Use saved searches or filters to quickly find and fix incorrect data.
Take a Holistic Approach
Always view data as a powerful business asset and consider how data is used, who relies on it, and what actions it drives. Keeping the bigger picture in mind ensures your NetSuite system delivers long-term value with high-quality, trusted information.
Tips for NetSuite Data Migration
According to NetSuite experts in the USA, successful NetSuite data migration is not just about clean data. It also depends on how early and how often you test your migration process. Here are some final tips to keep in mind:
- Start testing early
Begin testing the new NetSuite system with a small subset of migrated data as soon as possible. Gradually increase the size of the data sets over time.
- Use sample subsets to begin
Start with a few clients or orders, then progressively expand your testing to cover the full range of data, business processes, and system applications.
- Simulate real user scenarios
Run tests that reflect actual user tasks. This helps uncover hidden issues that may not be visible through basic data checks or technical validations alone.
Thorough testing ensures a smoother go-live experience and gives teams the confidence that the NetSuite system is ready to support daily operations.
Wrapping Up!
Data migration is a vital component of any successful NetSuite implementation. A well-planned and carefully executed strategy not only preserves the integrity and accuracy of your data but also helps minimize disruptions and unlock the full potential of the NetSuite platform.
Businesses can streamline the migration process and avoid common pitfalls by following best practices and working with experienced professionals. As a trusted NetSuite consultant, VNMT Solutions brings the expertise and guidance needed to ensure a smooth, efficient, and secure data migration.
Ready to migrate to NetSuite with confidence? Contact VNMT Solutions today to get expert support and a tailored migration strategy that fits your business needs.
Read More:
NetSuite Bulk Customer Data Updation
How To Secure Your Data With NetSuite?