
NetSuite Pricing Management is a great tool in which you can centrally manage, regulate, and change prices to optimize profitability. It offers users a single system to develop and maintain numerous pricing strategies while the user can manage prices for all consumers from one location. Additionally, with targeted promotional offers, retailers can increase sales and foster client loyalty with the help of NetSuite’s promotion engine.
What Is NetSuite Pricing Management?
The Oracle, NetSuite pricing management system enables you to monitor, regulate, and alter pricing from one central location to optimize your profitability. You can manage prices for all customers in one location if you use a single system to develop and maintain numerous pricing strategies. Merchants may use NetSuite’s promotion engine to increase earnings and improve customer loyalty by offering customized promotional offers.
Creating Pricing level
The Multiple Pricing feature allows you to create different price levels for customers to select from when placing a sales order. NetSuite pricing management allows you to set up to 1,000 different price levels, making it easier to offer different pricing levels to different customers.
For example, you may want to sell items at retail prices to some customers but offer discounts to others. By setting up multiple price levels, you can sell items at discounted retail prices or retail prices with discounts of 5%, 10%, and 15%.
To enable multiple Pricing:
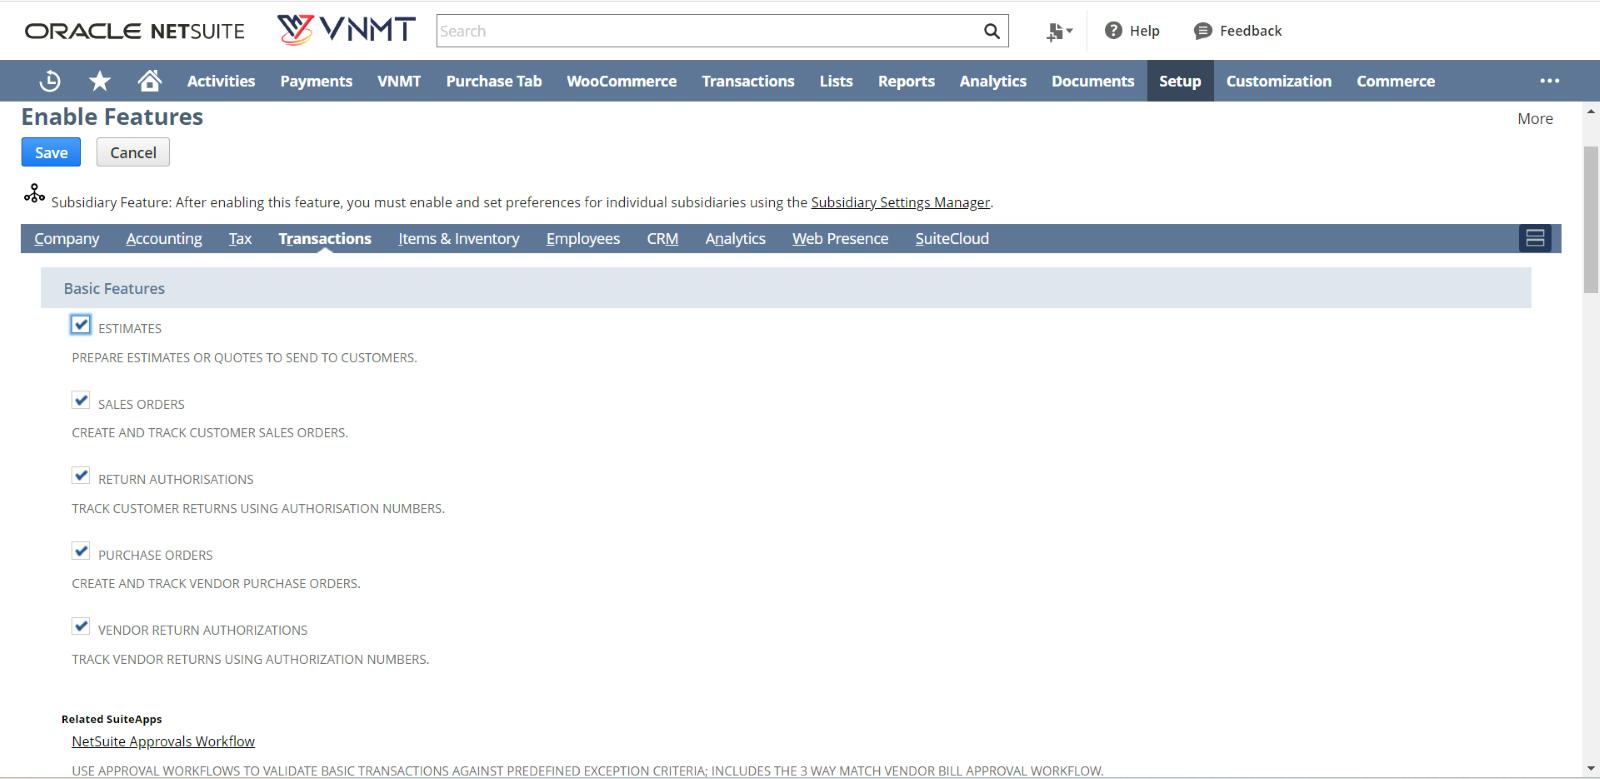
1. Enable the Multiple Pricing feature by navigating to Setup > Company > Setup Tasks > Enable Features
2. Go to the Transactions subtab and Click on it.
3. Make sure the Multiple Prices box is checked
4. Click Save.
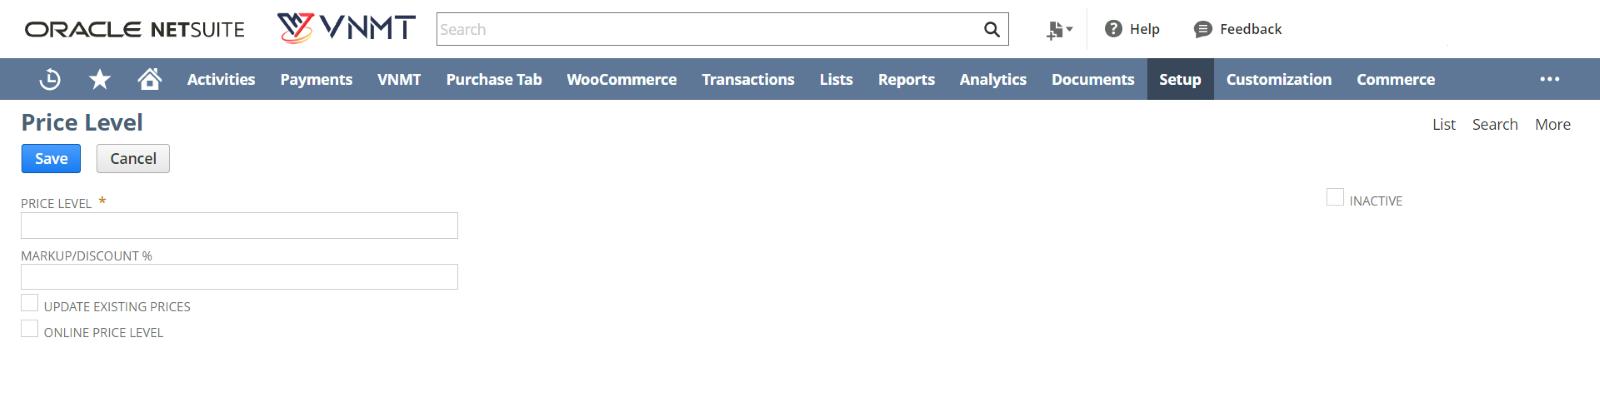
To create a new price level:
1. Click on Setup > Accounting > Setup Tasks > Accounting Lists > New.
2. To add a new pricing level, choose pricing Level.
3. The Price Level field on the Price Level page requires a name for the new price level.
4. Enter Positive/Negative % in the Markup or Discount Percentage field to Markup/discount prices that might available for this Price level. Adding or subtracting the positive or negative percentage of the Base Price level determines the price for this level.
(Note: A rounding error of 0.01% has been applied to this value.)
5. All items with this price level can be updated by selecting Update Existing Prices. This price level automatically updates the item price when creating a new record.
6. You can make this price level your online price level by checking the Online Price Level box.
7. To inactivate the record, select the Inactive checkbox. Neither NetSuite lists nor popup windows will feature inactive records. Checking Show All on list pages will allow you to see inactive records. Clearing the Inactive box can make this price level visible in lists.
8. Click Save.
Once creating pricing levels, go to Lists > Accounting > Items and input the prices for those levels on item records. When creating invoices, you can then choose the appropriate price levels.
Setting Up Item Pricing In NetSuite
To set up pricing for items
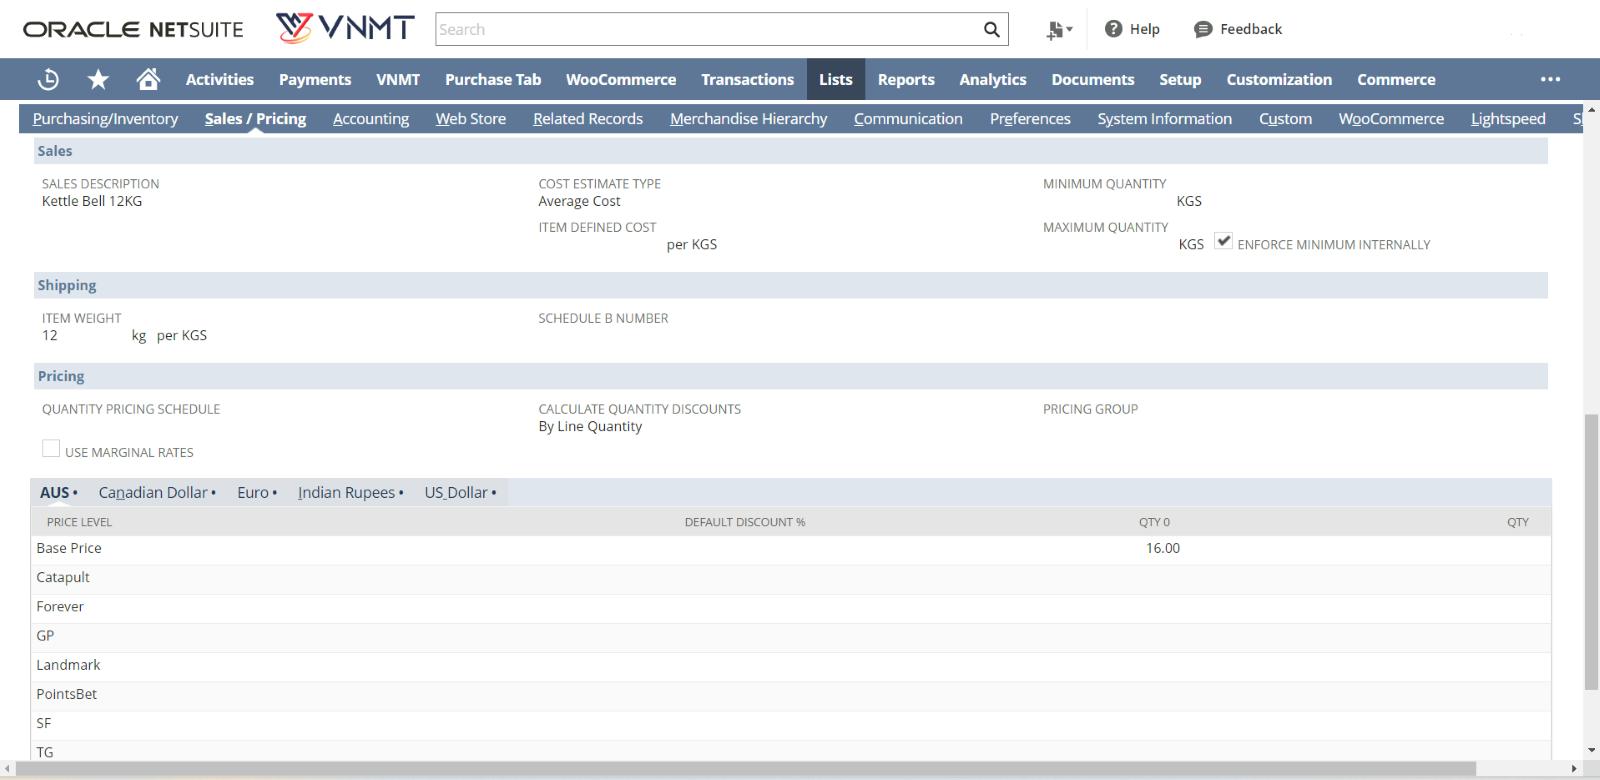
1. Click on the Sales/Pricing subtab while an item record is in edit mode.
(Note: Please do not use this subtab if the buyer wants to determine the price of an item, such as a donation or gift vouchers. Choose the Store subtab instead, and then select the Variable Amount box.)
The price you choose becomes the default amount if you input the price on the Sales/Pricing subtab and then select the Variable Amount box.
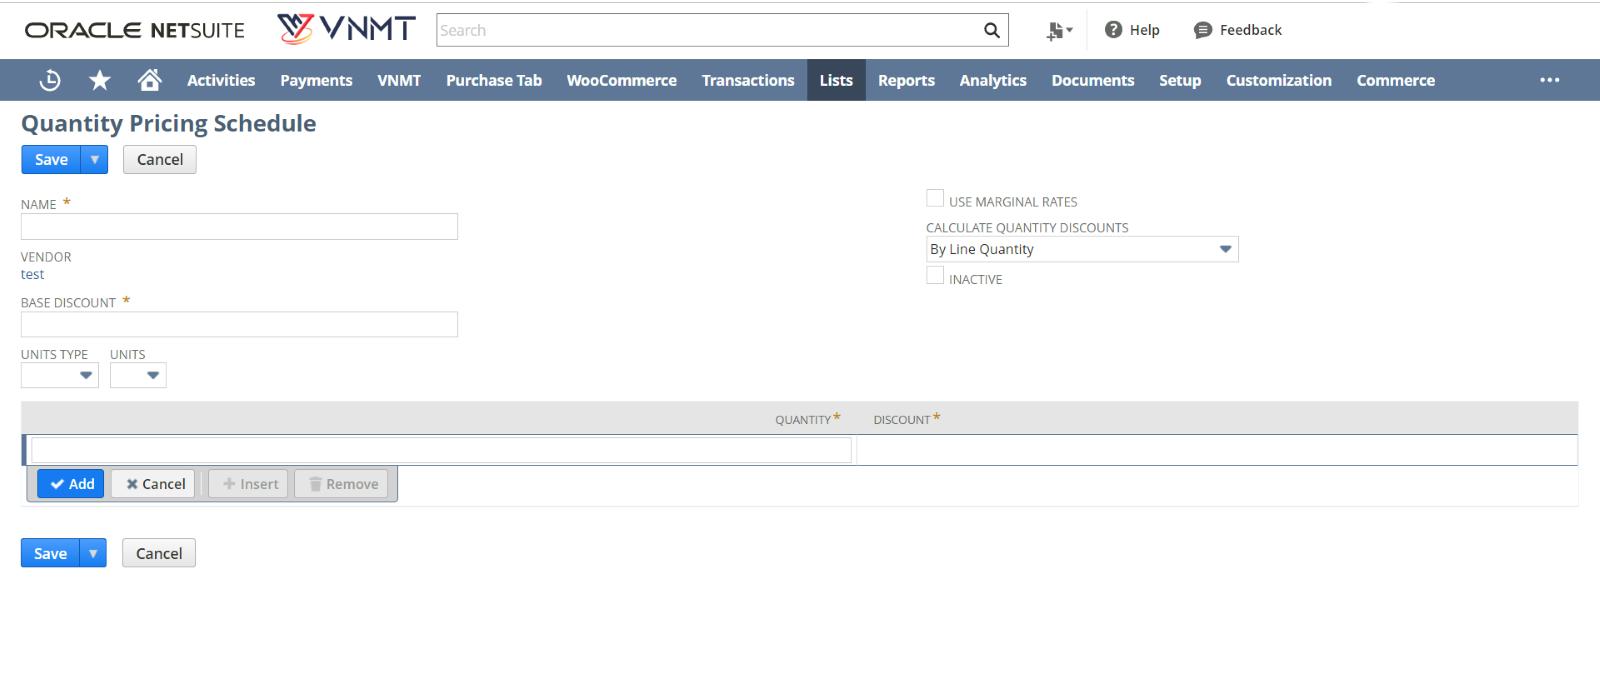
2. You can set the price for this item by selecting the pricing schedule you wish to use under Pricing if you use quantity pricing schedules. The fields for Use Marginal Rates and Calculate Quantity Discounts are specified when a pricing Schedule is chosen.
Lists > Accounting > Quantity pricing Schedules > New is where you can create price schedules.
3. You can use the Marginal Rate box if each pricing group should receive its own quantity discount.
(For instance, if 100 products are sold, there is no discount, but if more than 100 are sold, there is a 5% discount. If 150 products are sold, the first 100 will be sold at the regular price, and the remaining 50 will be sold at a discount of 5%. )
Leave this box empty if you want the discount applied to every item sold.
4. Select how to calculate the quantity for Pricing in the Calculate Quantity Discounts field. You have the following selections:
- By Line Quantity: Line items are priced according to their quantity.
- By Overall Item Quantity: The exact Pricing applies to all line items of the same item.
- By Overall Parent Quantity – When a transaction has a parent and a child item, prices are applied to all transaction items with the same parent. Quantity pricing for matrix items can be applied using this method.
- By Overall Schedule Quantity: All items in the transaction that use the same pricing schedule are priced together.
5. Select the appropriate pricing group for this item in the Pricing Group field. A group of items can be assigned, customer-specific price levels using pricing groups.
6. Click Save.
How To Manage NetSuite Item Pricing?
There are 4 Pricing Functions in NetSuite pricing management :
1. Multiple Pricing
2. Quantity Pricing
3. Quantity Pricing Schedules
4. Pricing Groups
1. Multiple Pricing:
In NetSuite, you can set up different price levels for each item and service, including an additional sales price for online items. To sell an item at different prices, you can create a sales price level for wholesale customers and another for retail customers. You can create up to 1,000 price levels.
With Multiple Pricing enabled:
1. When Multiple Pricing is enabled, the custom prices will be automatically filled in for transactions.
2. For customers making cash purchases, you can specify higher margin pricing.
3. High-volume customers can receive lower prices as a reward.
4. Customers see their custom price when they login to your website.
The assigned custom price level is given to the customer when they make a transaction. The buyer pays the base price if no custom pricing level is specified.
2. Quantity Pricing:
Quantity-based Pricing automatically applies different sales prices to items, depending on the quantity sold.
To enable quantity pricing:
1. To enable quantity pricing, you must go to Setup > Company > Enable Features.
2. Check the Quantity Pricing box within the Transactions subtab.
3. Click Save.
To set quantity pricing preferences:
1. Set your accounting preferences for quantity pricing by going to Setup > Accounting > Preferences > Accounting Preferences.
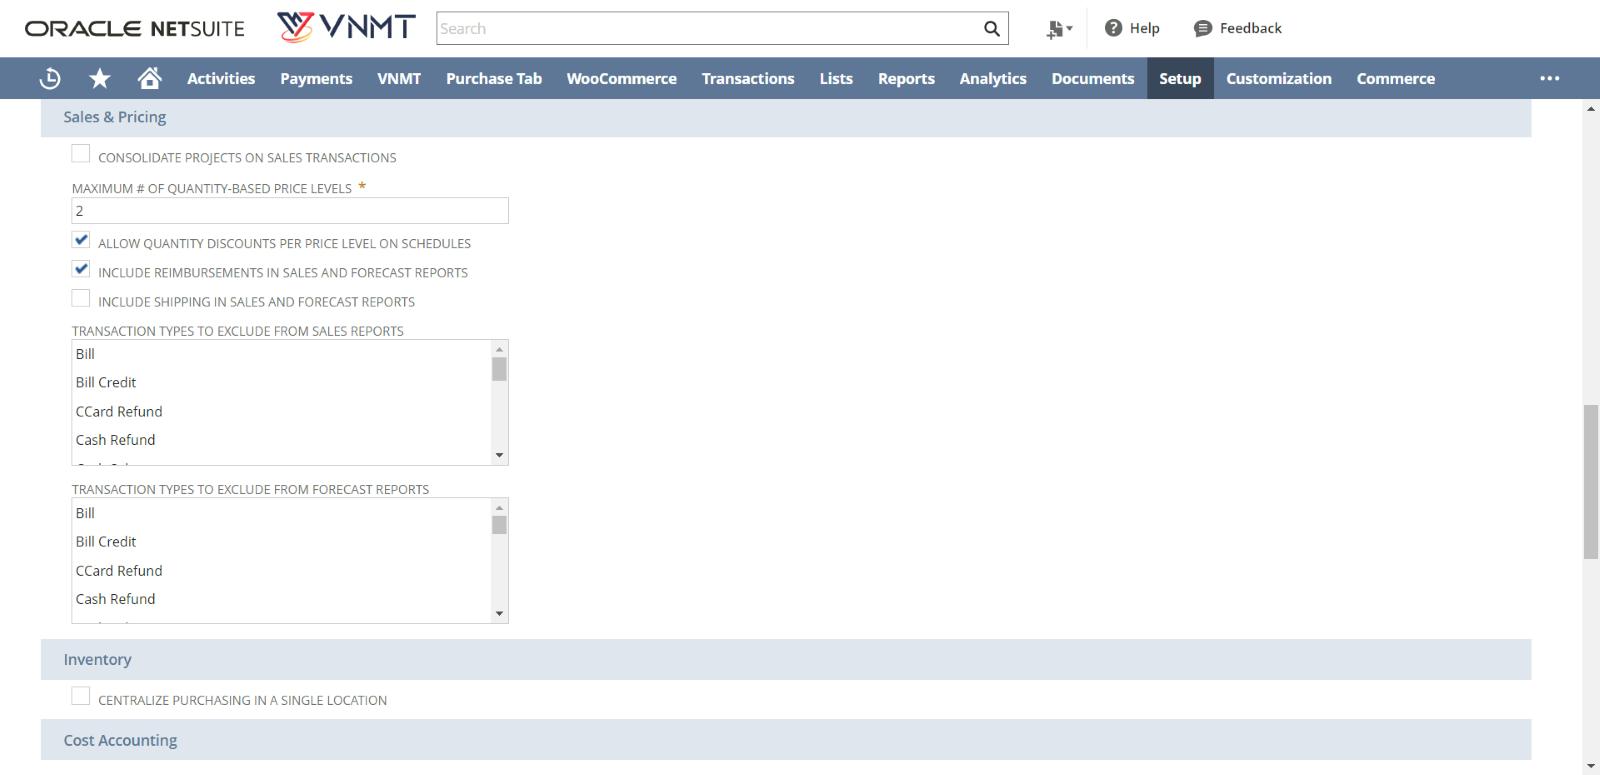
2. Click the Items/Transactions subtab.
3. Enter a number to limit the quantity-based price levels assigned to each item in the Maximum # of Quantity-based Pricing Levels field.
These quantities appear as columns on the item record sales/pricing subtab.
4. Check the Allow Quantity Discounts by Price Level box on the Schedules page to enter discounts for each price level.
5. Click Save.
You can now enter Pricing on the item records’ Sales/Pricing subtab.
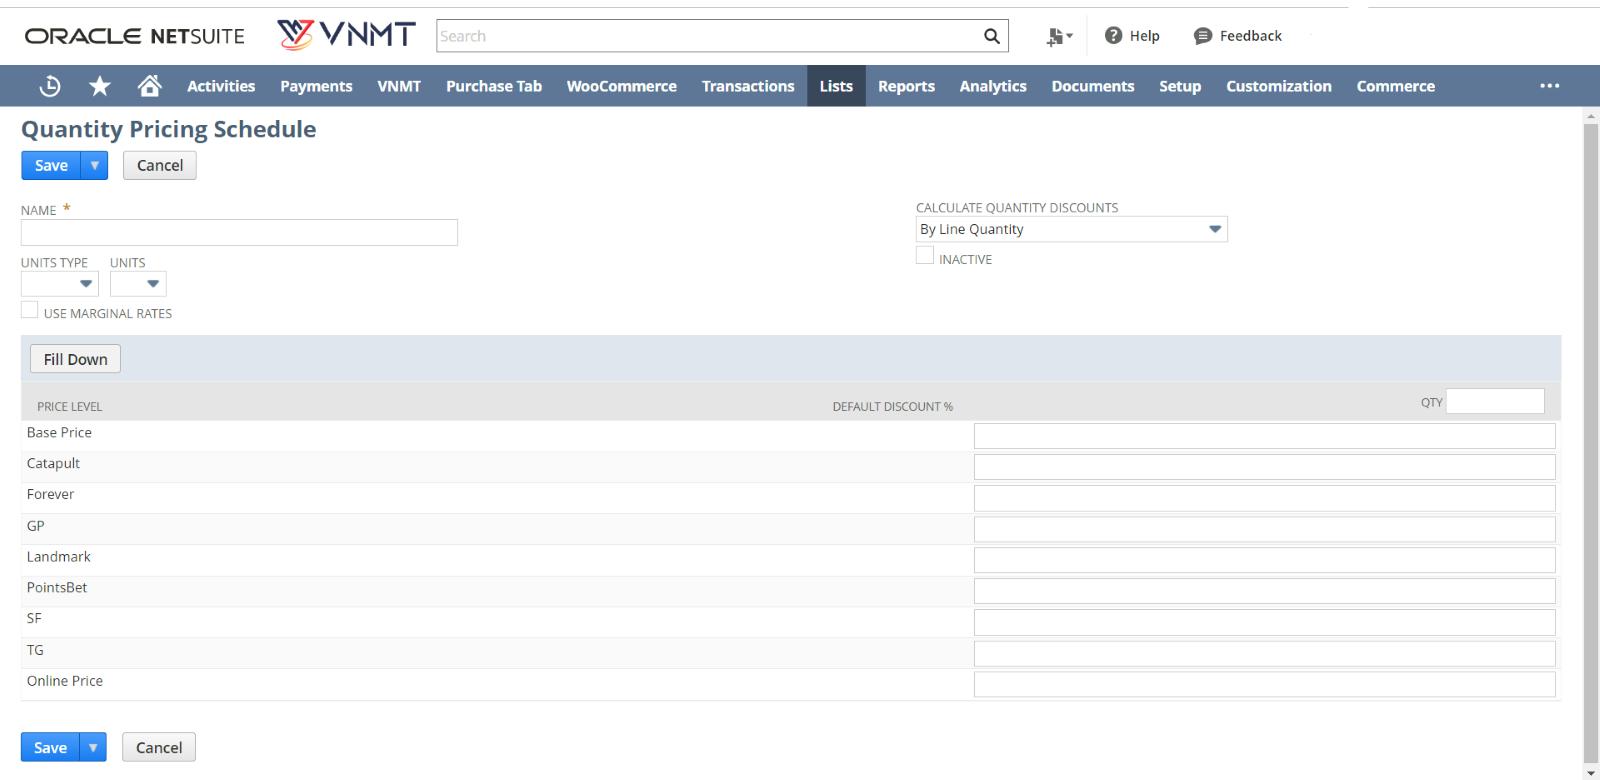
3. Quantity Pricing Schedules:
You can use quantity pricing schedules as templates to create, purchase and sale prices for goods. A quantity pricing schedule is applied to an item, and when it is, all price levels’ prices are dynamically generated.
Quantity pricing plans can be used to apply the rates you’ve agreed upon with vendors.
To associate a pricing schedule with a vendor:
1. First, You need to Go to Lists > Relationships > Vendors.
2. To associate a pricing schedule with a vendor record, click Edit.
3. Click the Financial subtab.
4. Click the Pricing Schedules subtab, and then click the New Pricing Schedule.
Give the price schedule a name. Set a Base Discount in the field provided.
5. Click Save. Although you can apply a schedule to any number of items, each quantity pricing schedule can only have one vendor associated with it.
3. Pricing Groups:
You can assign customer-specific price levels for groups of items using pricing groups. You could, for instance, name your pricing group Laptops and link it to each of your laptop-related items.
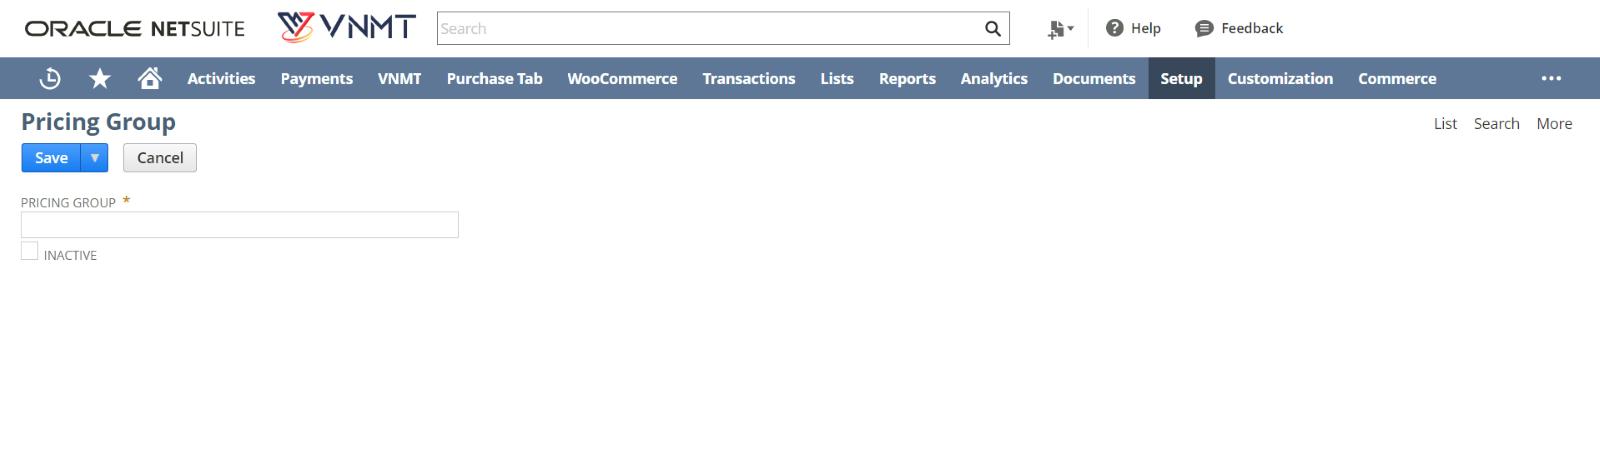
To create a pricing group:
1. First, you must go to Setup > Accounting > Setup Tasks > Accounting Lists > New.
2. Click Pricing Group in the Add to Accounting Lists window.
3. Give the price group a name.
4. Click Save.
(Note: A pricing group’s price level takes precedence over the customer’s price level). It is not more important than item pricing.)
4. Promotion Codes:
You can provide coupon codes that only apply to a particular item If the promotional codes feature is enabled.
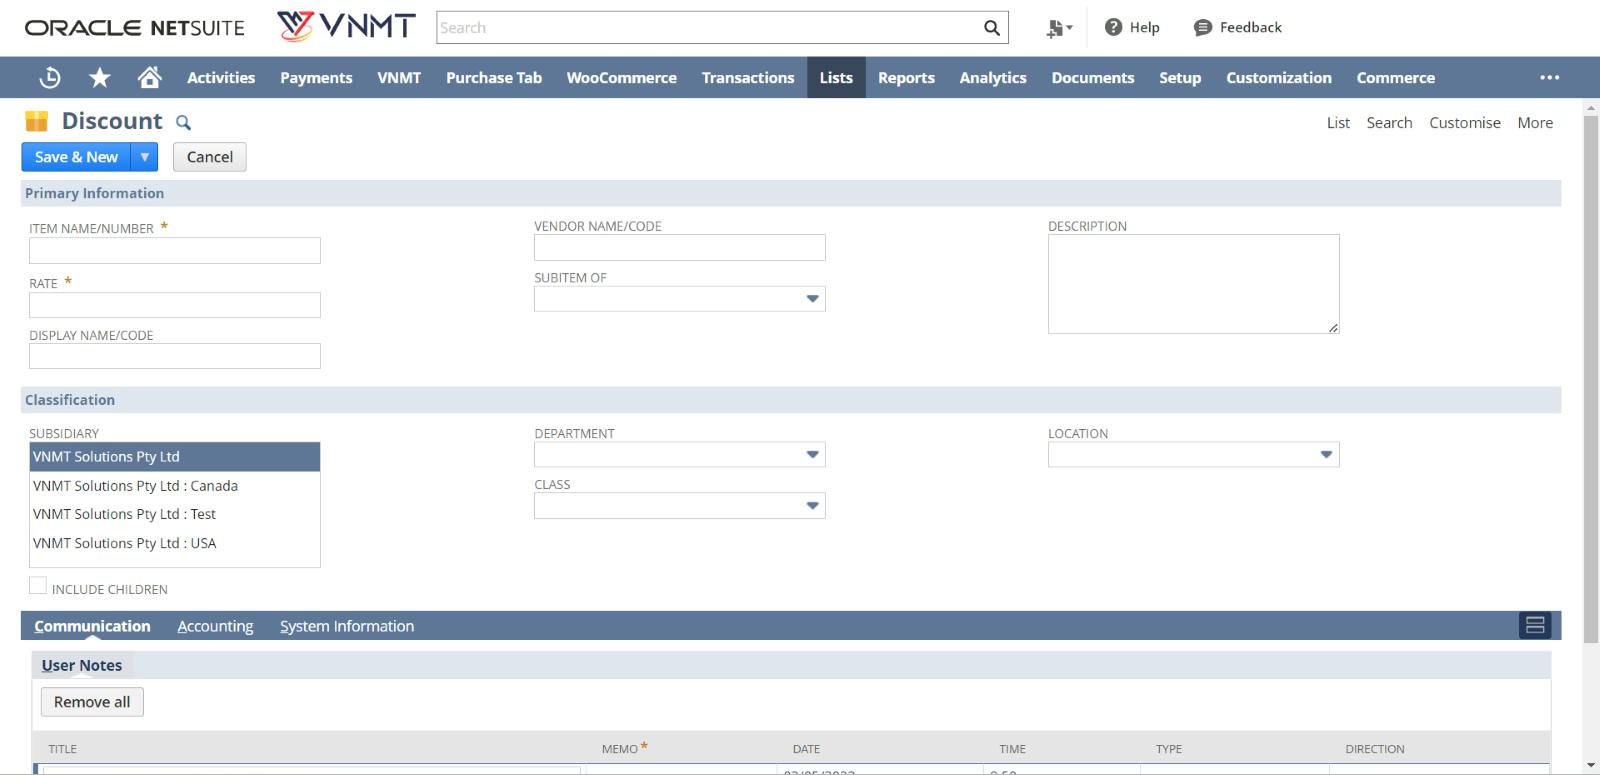
To create an item coupon:
1. First Enable the Promotion Codes feature. Secondly, Select Lists > Accounting > Item > New > Discount from the menu.
2. Once the feature is enabled, Set up the discount amount for the coupon by entering the dollar or percentage amount in the Rate field.
3. Access the Lists > Marketing > Promotion Codes > New for this coupon to create a promotion code.
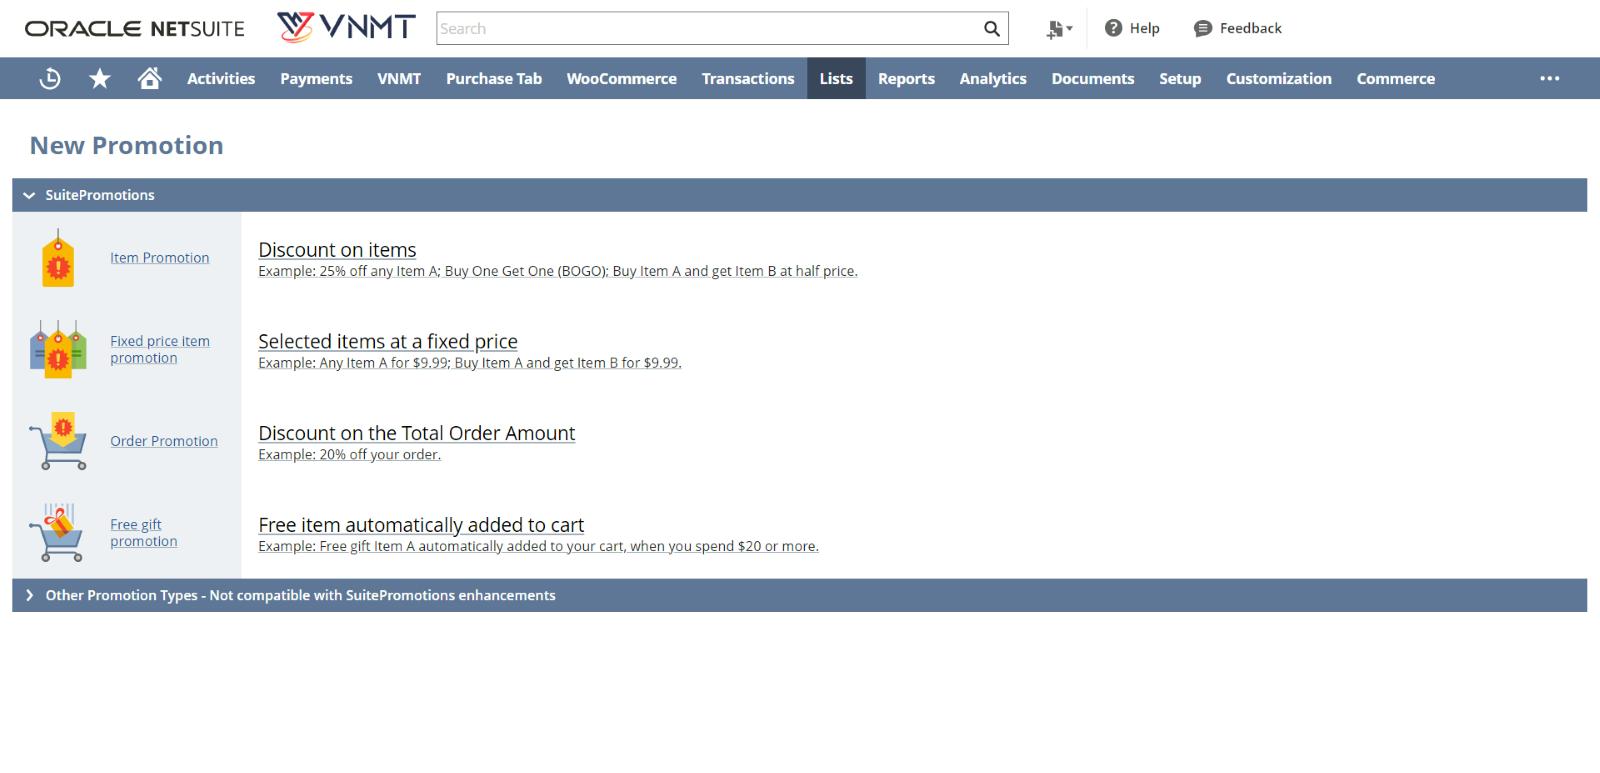
4. In the Promotion Code field, enter the coupon code customers will use to receive the discount. In the Discount field, select the name of the discount item you created for this coupon.
5. Choose First Sale Only in the Apply Discount To form to limit the number of times this coupon may be used by a single consumer. To enable multiple uses of the code, choose All Sales.
6. To set up the coupon redemption period, input the start date of when the coupon can be redeemed in the “Start Date Promotion” field.
7. Then, in the “End Date Promotion” field, enter the expiration date of the coupon.
8. For this coupon code to be made public, choose the Available to All Customers check box.
9. Only customers tied to the partners you choose on the Partners subtab can use this coupon if you uncheck this box.
10. On the Items subtab, select and add each item that you want this discount to apply to.
11. To avoid the discount being applied to your selected items, check the Exclude Items box.
12. Click Save.
This code can now be distributed to customers as a discount code for your chosen products.
(For instance, a product coupon offers a $10 discount on all cables. A cable costs $9, and speakers cost $40. The order is only discounted by $9. Discounts are applied before tax and shipping.)
Wrapping Up
NetSuite has traditionally been at the forefront of the ERP sector, from customizations to scalable pricing. NetSuite Pricing Management helps businesses gain a competitive edge by enabling them to quickly respond to market changes and customer demands with flexible and dynamic pricing strategies. Its ability to automate tasks that would otherwise be completed manually, as well as a consolidated back-end for all of your essential company activities, demonstrates that NetSuite ERP truly has it all. You can hire a NetSuite developer for additional help and support and guide you through the process of Setting up the price.
Read More: The Ultimate Guide to Vendor-Customer NetSuite Integrations